

After looking at this site, The Setup, I started thinking about how interesting it is to see how other people work. In light of that, I would like to share my painting set up. It seems simple enough, but it's some 15 years in the making.
On top of what's pictured above, I also can't live without:
- 2 of these floor lights. (very important)
- Lots of reference books
- My flickr favorites (in slide show mode)
- American Painter Brushes. They make the best small brushes in my opinion. I have a whole stash... the tips get bent quickly and must be tossed. Luckily they are pretty cheap.
- A .3mm mechanical pencil
- A 4H and 9H pencil
- A kneaded eraser
- A white retractable eraser
- Lots of Canson tracing paper (found to be the most translucent)
- White artist tape
- A scanner and photoshop
Ok that's all wonderful stuff. So that brings us to the process itself.
I took a few pictures of the steps and listed them out below. Every painting is different of course. Some have a detailed sketch without a lot of in-between. Some have a rough with more steps -- such is the case with this one, which was really more about structure. We'll start with the final, so you know what we're working toward.

Now, here's the sad little sketch that I started with:
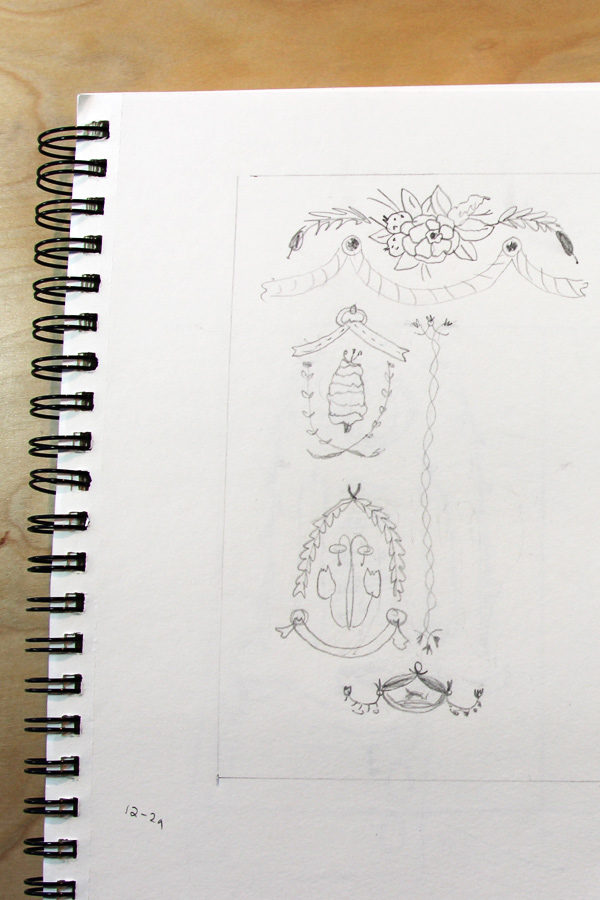
I don't really enjoy sketching in and of itself. I never like my sketches. Sometimes I like them later.... But, drawing is a necessary part of it. I can admit that.
I only have the left side drawn so that I can scan and flip in Photoshop. This particular painting, is more about structure, as I already knew the quadrants would be filled with neat little nature-filled cameos.

Hi Photoshop!
I have only started using Photoshop in the last few years. What Photoshop brings to the table is SCALE. And scale, layout and design are really important in my paintings. In part because of the symmetry. In part because of all of the individual elements. Photoshop lets me easily change sizes, and colors (which is more about mass/value, than anything).
I don't draw in Photoshop. I DO have a small library of old sketches, and bits I pulled from Flickr. Floral clip art type of stuff. Sometimes if I know I need a certain shape, I can drag something in as a placeholder (like with that red flower at the top/center.)
During this stage, I will print, erase.. draw over my prints, etc for a few rounds.

Once I'm happy, or happy enough to wing the details... I lay on a grid (again, in Photoshop) and print out my final draft. This is where I get serious with measuring and mapping out the placements and structure.
That grid you see off to the left, helps as well.
Tedious, boring and critical.

This is what allows me to put painting to watercolor paper! I do a little bit of pencil tracing. With this, I can do some light graphite transfer, and it's a good overlay while I'm painting to make sure I am holding true to my original grid.
Last thing I want, is for things to start going crooked. No, no.

Moving right along... Pictured above is a color study or practice run. I can try this painting out, fill in some ideas that I left off with the mock-up and frankly, it's a great warm up to paint. You wouldn't think it, but if I haven't painted for a week or so, I am not very good. After I finish something like this, I am all ready to go.
This is a pretty newish step to my process. It's a way to test out my idea and go, "Am I really doing this? Do I like it?"
Because, at the end of the day, I need to love it. Otherwise, I could be having ceviche on a patio somewhere....
Are you still reading this? Ok, next.

And, done.
I think the beauty of the final work, for me, is those fun little elements that I don't figure out ahead of time. If I had every single little bit predetermined, I would get bored.
I hope you got something out of that. I know there's benefit to me in documenting and looking over these steps.
You can read all day long about how other people do what they do. At the end of the day, your process is distinctly yours. I feel very much that way about what I have developed over the years. And once you get there and work through the kinks... it just gets better and better and better.


